Vacuum veneering -
Vacuum Veneering a raised panel door

Vacuum Veneering Techniques #5
Video that accompanies this article can be found here
Vacuum Veneering a raised panel door
The technique described here is for use with a standard vacuum veneer press. Typical vacuum bags are made from polyurethane, more industrial grade material as compared to vinyl. Both materials are available in .020". We have used the .020" poly vacuum bag because it is the most supple and flexible of all the options.
There are twoimportant factors in the success of this process in addition to the bag. The shape of the panel and the flexibility of the veneer. The shape should be a gradual curve and not have a right angle turn near the top of the cut. Most veneers will generally not bend into the angle and will either snap or just have a gap, thus not a good pressing.
The other factor is that the veneer must be softened so it bends and does not crack when being vacuum pressed. We used our VKS veneer softener which is diluted with an equal amount of water. It is sprayed on both sides of the veneer then placed in the vacuum veneering bag with plain paper on both sides and a caul on top. When under vacuum, the moisture gets wicked out from under the caul and will evaporate faster when under vacuum. You should change the paper several times to speed up the process.
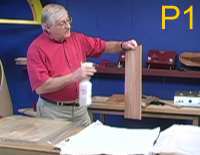
P1 shows spraying the veneer with the veneer softener.
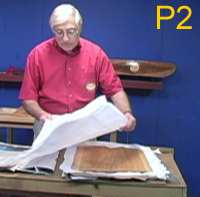
P2 is placing the wet veneer between several sheets of paper and placing a caul on top and putting the assembly in the vacuum press. Change the paper for faster drying time.
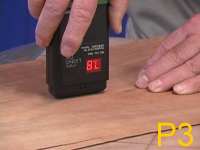
Check the moisture content to be sure you are back to the correct moisture level (moisture content MC). This is an important step and needs to be addressed with a moisture meter. If the MC is too high when it's pressed, the veneer can shrink and when it's out of the press and fully dried can cause crazing/cracking on the surface. Also, be sure to measure the center as well as the edges when checking the MC.
P3 When in the vacuum press, the edges will dry faster than the center.
Once you have shaped your panel and eased the top edge, apply glue to the substrate. We are using our VAK Bond 2000 veneering glue, a urea glue which is the type of glue recommended for veneering and laminating.
P4 It should be noted that most of the plywood's, MDF, etc., are made with urea glue as it has better characteristics than a typical yellow or white glue. If you are using a birds eye or other veneer with holes in it, you can minimize the glue push thru by allowing the glue to set-up for a few minutes. Less moisture will mean less push thru as it will evaporate and be absorbed into the substrate. How long you leave it open will depend on; the glue, temperature/humidity of your shop, how much glue was applied, the veneer, etc., you will need to test if this is an issue with you.
Also, if your birds eye is a light color and you are using the VB2000 veneering urea glue, consider adding a white tint to make it almost white. By controlling the amount of white tint that is added, you can go from the dark brown to almost white.
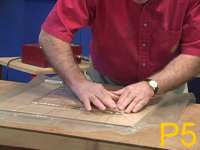
Pressing a single sheet of veneer verses a spliced sheet made of two or more pieces, is slightly different. For the single sheet, lay the veneer on the panel and smooth over the top surface to remove any bubbles or wrinkles. Slide the assembly into the bag and pull vacuum. Make sure the bag does not have any wrinkles over the veneer. We are doing it without the usual caul because it's difficult to make a caul to totally fit the panel. We can easily smooth out any wrinkles in the bag before it is fully evacuated. When the bag is pumped down, you will see slight wrinkles in the veneer in the four corners. Because the veneer has been softened, it is pliable and these wrinkles can be pushed out with your thumb. Just work each corner until the veneer is down on the, it only takes two or three rubbings to get it flat.
If you are vacuum pressing a book matched veneer or sheet that has been taped together (use veneer tape only), then you need to include another step. Once you put it in the vacuum bag, as vacuum is being applied smooth over the bag on the top of the panel. Then take and push the bag up around the sides so as to raise the bag like it has a bubble all around the edge of the panel. The reason for doing this is that we have seen some pulling apart at the seam if the outer edge gets pressed at the same time as the top. It doesn't always happen. However, it's worth the extra step to have the bag press on the top surface first and thus hold it in place before the edges start getting pressure. Then rub out the wrinkles in the corner.
Allow the glue to dry according to the manufacturers instructions. Remember, you can speed the cure time of any glue by applying heat. We have used an electric blanket on top of the bag with another cover blanket covering it and have reached 100 degrees F with this method.
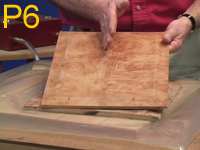
P6 is the finished piece.
